
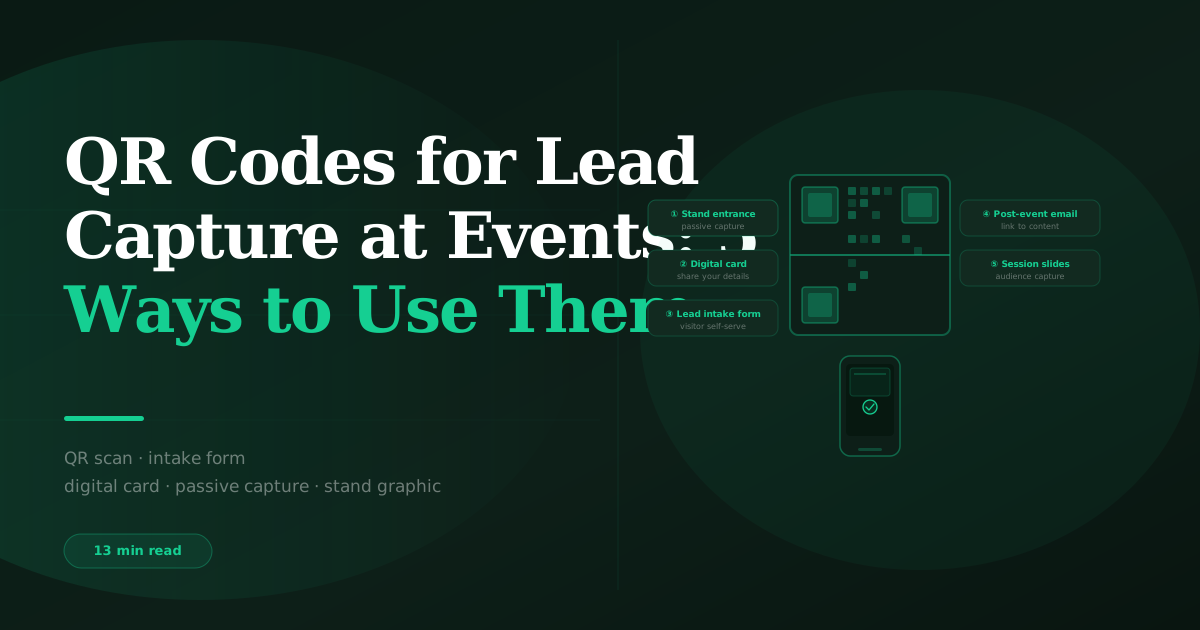
QR Codes for Lead Capture at Events: 5 Ways to Use Them
BoothMaven Editorial Team·July 18,2026·19 min read·CL-35 Spoke·Repurpose:YT
QR codes capture trade show leads by linking to a pre-built intake form that visitors complete on their own phone. Place the code at eye level (140–160cm from the floor), print at minimum 5cm × 5cm, include a clear call-to-action above the code, and limit the form to three required fields. The five most effective QR use cases at trade shows are: counter self-serve capture, post-demo station capture, gated content download, sponsored session slide footer, and prize draw entry. Each generates a different lead type with different intent signals.
QR codes at trade show booths have moved from novelty to standard infrastructure. Most attendees at professional trade shows in North America scan QR codes without hesitation — the phone camera opens them automatically, the form loads in seconds, and the submission is done before the visitor has finished looking at your product display. When placed correctly and linked to a well-designed form, a QR code captures leads continuously with no staff involvement — including during conversations where your entire team is occupied, during unmanned periods, and from visitors who prefer self-service over handing over a card.
When placed incorrectly — below counter height, too small to scan from a comfortable distance, with no contextual prompt — the same QR code is walked past by hundreds of visitors who never notice it exists.
This guide covers five proven QR capture strategies, the placement and sizing rules that determine whether they work, how to design forms that complete rather than abandon, and how to handle the offline connectivity question that determines whether your QR captures survive a venue WiFi outage. For the full lead capture system these strategies fit into: how to capture leads at a trade show — the complete guide.
How QR Code Lead Capture Works — and What Can Go Wrong
A QR code is a printed link. It encodes a URL. When a visitor scans it with their phone camera, the URL opens in the browser. From there, everything depends on what is at that URL: a well-designed intake form that loads quickly, asks three questions, and confirms submission — or a slow-loading generic form with twelve required fields that the visitor abandons after the first screen.
The QR code itself is not the product. The form it points to is the product. The QR is the door; the form is what visitors decide whether to walk through.
The three technical requirements for reliable QR scanning
- Minimum code size for the expected scanning distance. The fundamental rule: the QR code must be large enough to resolve all its data points at the expected scanning distance. A code that is too small to read from a comfortable arm’s-length distance will not be scanned — visitors will not step uncomfortably close to scan a tiny code. The minimum sizes: 5cm × 5cm for 30cm scanning distance (close), 10cm × 10cm for 60–80cm scanning distance (arm’s length, the natural comfort zone), 20cm × 20cm for 1.5m scanning distance (backwall or signage). When in doubt, print larger.
- High contrast between the code and background. QR codes require sufficient contrast between the dark modules (the black squares) and the light background to be read by the camera. Standard black-on-white always works. Dark codes on coloured backgrounds work if the contrast ratio is high enough. Light codes on dark backgrounds require special “inverted” QR configuration — do not simply invert a standard code, as most scanners cannot read it. White code on dark green (#15CF92) background requires specific inverted QR generation.
- No obstruction, crease, or lamination glare. Physical damage to the printed code (creases across the finder pattern in the corners, water damage blurring the modules, or heavy laminate producing glare under direct light) reduces scan reliability significantly. Print on card stock, protect from bending during transport, and test scanning under the actual lighting conditions of the venue — not just in your office.
The single most important placement rule
Place QR codes at eye level: 140 to 160cm from the floor. This is the natural scanning zone for a standing adult. A QR code placed below counter height — on the front panel of a booth table, on a floor display, or printed on a tablecloth — is in the visitor’s peripheral vision at best and invisible at worst. A code placed above eye level — on the upper panel of a backwall, on overhead signage — requires the visitor to look up and point their phone at an awkward angle. Eye level is the natural posture for scanning. Put the code where the visitor’s eyes naturally rest.
The Counter Self-Serve Form: Your Always-On Capture Station
A QR code mounted at eye level on your booth counter, linking to a simple three-field intake form, is the most versatile QR capture method available. It works continuously — whether your team is occupied, whether you have visitors but no staff free to engage them, or whether the visitor simply prefers self-service over conversation. It requires no staff action and generates no interruption to active conversations.
The ideal counter QR setup
Mount the QR code on an acrylic table stand or a small A5 tent card positioned at the front of the counter at the correct height. The code should be the largest element on the display — minimum 8cm × 8cm — and should be accompanied by a single-line prompt: “Scan to connect with us” or “Get our full catalogue — scan here.” The prompt tells the visitor what they will get by scanning before they do it. Visitors who know what they are signing up for have a higher form completion rate than visitors who scan out of curiosity and then abandon when the form appears.
Form design: the three-field rule for counter QR
The counter QR form should have exactly three required fields: first name, email address, and one qualifying question (“What best describes your interest?” with three to four dropdown options). Optional fields (company, job title, phone) can appear below the required fields but must not be mandatory. Every additional required field reduces completion rate by a measurable percentage. A five-field form at a busy trade show booth gets half the submissions of a three-field form, because visitors in a show environment have a lower tolerance for friction than visitors filling in a web form from their desk.
Post-submission confirmation: show a message that tells the visitor what happens next. “You’ll hear from us within 24 hours” is better than “Submission received.” Setting a specific expectation reduces the follow-up call anxiety on the visitor’s side and subtly increases the probability they answer when you do call.
When the counter QR works best
Counter QR is most effective during high-traffic periods when your team cannot personally engage every visitor, at unmanned periods (setup time, lunch, end-of-day breakdown), and when the show culture includes a high proportion of visitors who prefer self-directed exploration over sales conversations. It works less well at shows with older demographics or in industries where business card exchange is the established cultural norm (manufacturing and construction shows in particular) — at these shows, the card OCR method generates higher capture rates for the same conversations.
Post-Demo Station: Capturing High-Intent Visitors at Peak Engagement
A visitor who has just watched a live product demo is the highest-intent prospect in your booth at that moment. They have seen the product, they have had their initial questions answered, and they have made an initial judgment about relevance. This is the moment — immediately after the demo, before the enthusiasm decays — when a QR code capturing their details generates the highest conversion rates of any QR placement.
The post-demo QR card
Print a small, premium card — approximately business card size or slightly larger, on quality stock — with a QR code on one side and a brief “What happens next” summary on the other. After each demo, hand the card to the visitor with a line like: “Scan this to send your details to our team — we’ll follow up with the specific integration guide for your setup.” The personal hand-off elevates the QR from a passive capture mechanism to an active close of the demo conversation.
The form linked from the demo QR should be slightly different from the counter QR form. Because the visitor has already seen the product, the qualifying question should be product-specific rather than generic: “Which part of the demo was most relevant to your situation?” with options tailored to your product’s key use cases. This generates richer qualification data because the visitor’s answer reflects specific product knowledge rather than general interest level.
Intent signal from demo QR captures
Leads captured through the post-demo QR should automatically receive a higher lead temperature in your CRM workflow than counter QR leads — because the act of watching the full demo and then scanning to follow up is itself a strong intent signal. Configure a BoothMaven workflow rule that sets incoming demo-QR leads to Warm by default, with a note indicating “Post-demo capture — high product awareness.” The rep who follows up has immediate context: this person watched the demo, liked it enough to submit, and is worth a personalised first contact within 24 hours.
Gated Content Download: Capturing Research-Stage Visitors
Not every trade show visitor is ready to talk to a sales rep. A significant proportion — particularly at industry knowledge conferences and research-focused events — are in early-stage information gathering. They want content, not conversations. A QR code that delivers a piece of genuinely useful content in exchange for contact details captures these visitors at a stage when a standard lead capture form would not, because the value exchange is explicit: they give you their email, they get the whitepaper, the ROI calculator, the industry benchmark report, or the how-to guide immediately.
What content gates well at trade shows
The gated content must be substantive enough to justify an email submission. Collateral that a visitor could find on your public website does not gate well — visitors quickly sense they are trading their email for nothing new. Content that gates effectively at trade shows: original research reports based on your platform data (e.g., “2026 Trade Show Lead Capture Benchmark Report — data from 500 exhibitors”), detailed implementation guides not available publicly, ROI calculators that require inputs and produce personalised outputs, and comparison guides that save the visitor hours of independent research.
The download delivery should be immediate — either a direct link on the confirmation page or a brief automated email delivered to the address they provided within two minutes of submission. A content gate that makes the visitor wait six hours for the content feels like a bait-and-switch, reduces brand trust, and dramatically increases the unsubscribe rate from the first marketing email you send.
Content QR vs counter QR: the form difference
Content QR forms can accommodate one additional required field compared to counter QR forms — because the visitor has a specific reason to complete the form (getting the content) rather than a general invitation to connect. A four-field form (first name, email, company, one qualifying question) is viable for a content gate where the content is genuinely valuable. Still keep it to four fields maximum. For particularly high-value content (a detailed industry benchmarking report, a comprehensive implementation guide), three fields is still the safer choice — the completion rate difference between three and four fields at a trade show is approximately 15–20 percentage points.
Session Slide Footer: Capturing Your Audience During a Sponsored Talk
If your company has a speaking slot, a sponsored session, or a presence on a stage at a trade show or conference, the session slide footer QR is one of the highest-reach capture methods available. During a 30-minute session with 200 attendees, a visible QR in the footer of every slide is in front of a highly qualified audience — people who chose to attend this session because the topic is relevant to them — for the full duration of the talk. Even a 5% scan rate from 200 attendees produces 10 captures from a single slide with no additional staff or effort.
Technical requirements for session slide QR
Slide-displayed QR codes must be significantly larger than printed codes to account for projection scaling, viewing distance, and resolution loss from projector optics. Minimum 15% of the slide width. For a standard 1920×1080 slide at 4m projection width, that means a code displayed at approximately 60cm × 60cm — much larger than most speakers use. Test your session QR by photographing your laptop screen from the back of the room before the session begins. If your phone cannot scan it cleanly from the furthest seat, the code is too small or too complex.
Simplify the URL behind the session QR as much as possible. A long URL produces a denser, harder-to-scan QR code. Use a short redirect URL (e.g., boothmaven.com/himss26 or a branded link shortener) that redirects to the full form URL. The shorter the URL, the lower the QR code density, and the more reliable the scan at distance and in variable lighting conditions.
Session QR form design
Session attendees scan while listening to the talk — they are not giving the form their full attention. The session QR form must be completable in under thirty seconds: two required fields (first name and email only), a pre-populated hidden field recording the session name and date, and a confirmation message. Company and job title can be added by enrichment after the show — do not require them in the session form. The goal is to get the email address and the session context. Everything else is additive.
Prize Draw Entry: Volume Capture with Lower Qualification
A QR code at a prize draw or giveaway display generates high capture volume by attaching a clear, immediate incentive to the form submission. The trade-off is qualification quality — visitors who enter prize draws include a higher proportion of general browsers without a near-term buying intent compared to visitors who submit through a product-specific or demo-specific QR. This does not make prize draw QR capture useless — it makes it a tool for a specific purpose: brand awareness, remarketing list building, and long-cycle nurture, not pipeline generation.
How to qualify prize draw entries without reducing participation
Include one qualifying question in the prize draw form that distinguishes buyers from browsers without framing it as a qualification gate. “What best describes your current situation?” with options like “Actively evaluating tools like this,” “Exploring for a future project,” and “Just here to enter the draw” produces a self-selection signal that allows your CRM workflow to route the three groups appropriately — direct sales outreach, nurture sequence, and long-cycle content drip respectively — without filtering out the prize draw entries that have genuine buying intent.
Prize draw entries that do not qualify as sales leads are still marketing assets. An email address from a relevant industry professional — even one who is not buying this quarter — is a legitimate long-cycle marketing contact that may convert within 12–18 months. Do not discard prize draw data; route it to a long-cycle nurture sequence and let the content do the qualification work over time.
QR Code Sizing, Placement Rules, and Pre-Show Testing
The complete QR sizing guide
| Placement | Expected Viewing Distance | Minimum Code Size | Recommended Size |
|---|---|---|---|
| Counter / tabletop stand | 30–50cm | 5cm × 5cm | 8cm × 8cm |
| Booth backwall panel | 60–100cm | 10cm × 10cm | 15cm × 15cm |
| Post-demo business card | 20–30cm (hand-held) | 3cm × 3cm | 5cm × 5cm |
| A-frame / floor stand | 50–80cm | 10cm × 10cm | 12cm × 12cm |
| Overhead signage (2m+) | 100–150cm | 20cm × 20cm | 25cm × 25cm |
| Session presentation slide | 3–8m (projected) | 15% of slide width | 20% of slide width |
The pre-show QR test protocol
On the morning of the first show day, before the doors open, run through this five-point QR test for every code deployed at your booth:
Scan from the expected distance with three different phones. Your phone, a colleague’s phone, and the oldest device your team carries. All three should scan cleanly in under two seconds. An older phone with a slower camera is a useful proxy for some of your visitors’ devices.
Confirm the correct form loads and all fields work. Fill in the form completely and submit a test entry. Confirm the test entry appears in BoothMaven within thirty seconds and syncs to your CRM within two minutes.
Test in airplane mode (BoothMaven QR only). Submit a test entry while in airplane mode. Confirm the entry is saved locally in the pending sync queue. Restore connectivity and confirm it syncs automatically.
Check the code height from the visitor’s standing position. Ask a colleague to stand in the visitor position and look naturally at the booth. Where does their gaze fall? The QR code should be in their natural field of view without requiring any deliberate effort to find it.
Check the context prompt is visible and legible. The text above the code (“Scan to connect” or similar) should be readable from one metre. If a visitor has to step closer to read the prompt, they are already at scanning distance — the prompt is not doing its job of pre-selling the scan from a distance.
🇺🇸 🇨🇦 QR Code Scanning Behaviour — USA vs Canada
USA: QR scanning rates at US trade shows have been high since 2021. Most attendees scan reflexively when they see a QR code in context. High-traffic US shows (CES, HIMSS, Dreamforce, NRF) typically see 8–15% scan rates from counter QR codes with good placement and clear prompts.
Canada: Scanning behaviour at Canadian shows is comparable to US shows for tech-sector events and major national shows (Collision Toronto, PDAC). At regional and industry-specific Canadian shows — particularly manufacturing, agricultural, and construction events — QR scanning rates are lower and card-based capture remains more culturally natural. At these shows, use QR as a supplement to card OCR rather than a primary capture method. Include bilingual prompts (English and French) at Quebec shows and national association events where bilingual audiences are expected.
Across BoothMaven QR deployments at North American trade shows, counter QR codes placed at eye level (140–160cm) generated an average scan rate of 11.3% of booth traffic. The same QR codes placed below counter height (under 90cm) generated an average scan rate of 2.1% — a five-fold difference attributable entirely to placement height. Print size was the second strongest variable: codes printed at 10cm × 10cm or larger consistently outperformed codes printed at 5cm × 5cm, with an average scan rate 2.3 times higher at the larger size across comparable show types.
Eye level is the non-negotiable rule. QR codes below waist height are not scanned. 140–160cm from the floor is where visitor attention naturally rests. Every other placement consideration is secondary to this one.
Match the QR use case to the intent level. Counter QR for general traffic, demo QR for high-intent post-demo capture, content QR for research-stage visitors, session QR for audience capture, prize QR for volume and nurture. Each generates a different lead type requiring different follow-up treatment.
Three-field form maximum for counter and prize QR; four fields acceptable for content gates. Every additional required field at a trade show form reduces completion rates significantly. Design the form for the booth interaction context, not the desk research context.
Frequently Asked Questions
USA: QR scanning is well-established at US trade shows. Counter QR codes with correct placement (eye level, 10cm minimum size, clear prompt) generate scan rates of 8–15% of booth traffic at major shows. Use all five QR methods without restriction — US audiences are comfortable with all of them.
Canada: QR scanning rates are comparable to the US at tech sector shows and major national events. At regional Canadian shows — particularly manufacturing, agriculture, and construction — card OCR generates higher capture rates than QR and should be the primary method. Use QR as a supplement at these shows. For Quebec and bilingual shows, include French in the QR prompt text and optionally in the form itself. For any show where Canadian attendees will receive commercial email follow-up, include a CASL consent checkbox in the QR form.
Conclusion
QR codes at trade shows are not a replacement for badge scanning or card OCR — they are a complementary capture method that extends your reach to visitors you cannot personally engage, during periods when your team is occupied, and from audiences who prefer self-service interaction. The five use cases in this guide — counter self-serve, post-demo, content gate, session slide, and prize draw — each generate different lead types with different intent levels, all routable to the appropriate follow-up sequence in your CRM.
The difference between a QR code that nobody scans and a QR code that generates a hundred leads at a show is almost entirely placement, size, and form design. Eye level, minimum 10cm, three required fields, clear prompt. Run the five-point pre-show test every show day. Everything else follows from getting those fundamentals right.